
Set the camera and the emotion for every line
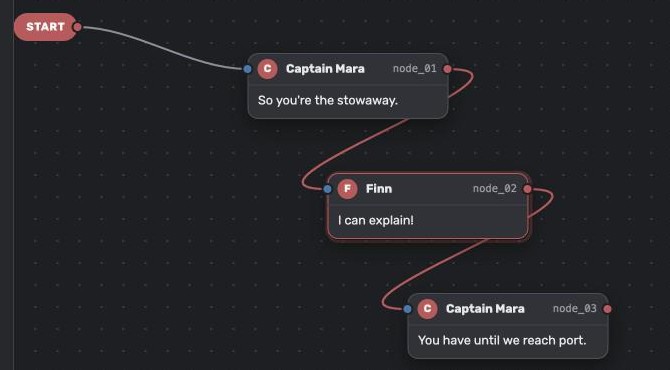
The case: you're making a 3D game, and every line of dialogue plays as a small cutscene. For each line your game needs to know where the camera goes and how the speaking character feels. Writers choose both while they write, but the game only has three camera setups and five face animations, so a writer should only be able to pick one of those.
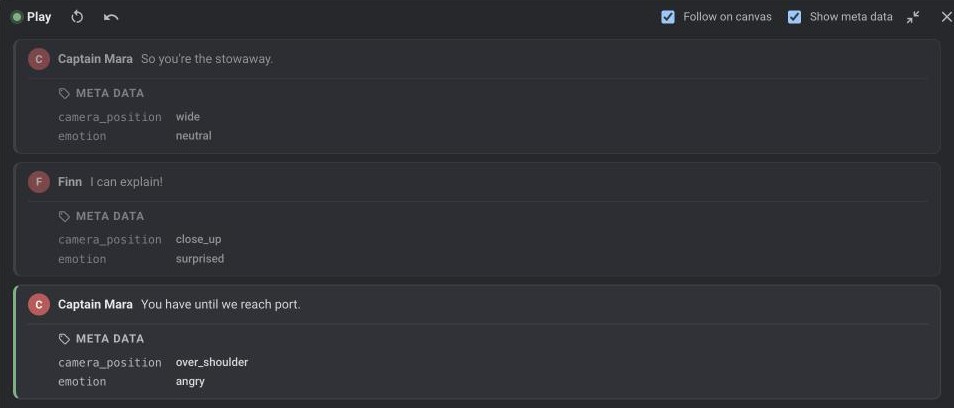
Captain Mara: So you're the stowaway.        camera: wide           emotion: neutral
Finn:         I can explain!                 camera: close_up       emotion: surprised
Captain Mara: You have until we reach port.  camera: over_shoulder  emotion: angry
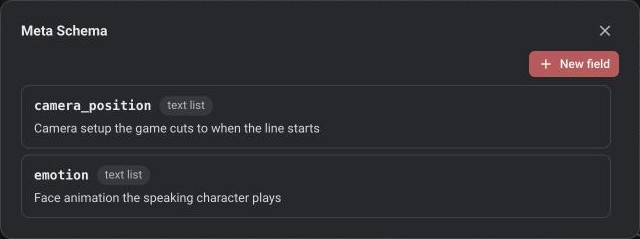
The short answer: add two text list fields to the game's meta schema, camera_position and emotion, and
type the values your game supports as their options. Writers then pick a value for each line from a dropdown in the
node's Meta data card, and nothing else can be entered.
1. Add the camera_position field
You set this up once per game, and every dialogue in the game can use it.
- Open the game and click the pencil next to Meta schema in the explorer on the left.
- Click New field and name it
camera_position. Names use small Latin letters and underscores. - Set Type to text list.
- Under Options, type the camera setups your game has, one per line:
wide,over_shoulder,close_up. - Add a Comment like Camera setup the game cuts to when the line starts, so writers know what it does. Click Add field.
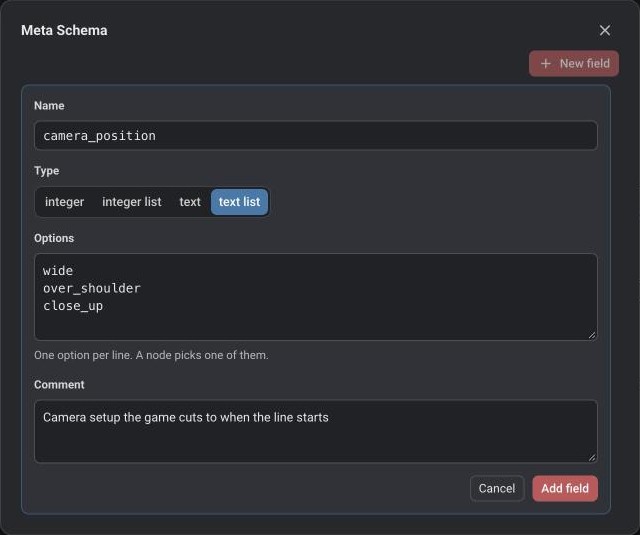
The options are written exactly as your game expects them. A writer can't type closeup or Close Up by mistake,
because they never type a value at all.
2. Add the emotion field
- Click New field again and name it
emotion. - Set Type to text list.
- Under Options, type one emotion per line:
neutral,happy,sad,angry,surprised. - Add a comment like Face animation the speaking character plays, and click Add field.
3. Pick the camera and the emotion on each line
- Open the dialogue and select a node, here Finn's "I can explain!"
- In the Meta data card, open the
camera_positiondropdown and pickclose_up. - Open the
emotiondropdown and picksurprised.

The value is saved as soon as you pick it. Pick the empty choice (—) to clear it. Hover over a field to see its comment and its options.
4. Test it
- Click Show player and turn on Show meta data at the top of the player.
- Play the dialogue. Under every line the player shows its Meta data: the camera and the emotion your game will use for it.
- Look for lines without a camera or an emotion and fill them in.
Variations
One camera for a whole scene. Draw a Meta Area around the nodes of a scene and set camera_position to
wide in its Meta data. Every node inside gets the value, and the node shows which area it comes from.
Numbers instead of names. If your game reads a camera angle or an animation index, pick integer list and use
options like 0, 45, 90 and 180. Every node then holds one of those numbers.
Change the options later. Open the field again to add an option, reorder them or fix a typo. LoreHub won't let you remove an option that a node or a Meta Area still uses, and tells you which one.
More per-line data. The same works for anything your game needs per line: a voice-over take, a music cue, a character's pose. Add a text list or integer list for each.
In your game
Each node exports its values in metaData, as the field's id and the chosen option, and the export lists every field
with its type textList and its options, so your game can check the values or build its own lookup from them. See
Meta Schema v1 and
MetaData. In Godot, the
LoreHub Dialogue Player gives you the values by name on every
line, for example line.meta["camera_position"].
Did this answer your question?
Still need help?
Can't find what you're looking for? Ask us, we read every question.