
How to Write Branching Dialogue for Games
Structures, techniques and testing for conversations that react to the player.
Branching dialogue is where game writing stops being a script. Every choice you give the player is a promise that the conversation will listen, and every branch you add is one more path someone has to write, test and translate. This guide covers how to structure branching dialogue so it stays manageable, how to write choices that matter, and how to test it and hand it to the game.
The building blocks
Almost every dialogue system, whatever the tool, is made of the same few parts:
- Nodes: a line, said by a speaker.
- Options: the answers the player can pick after a node.
- Links: where the conversation goes next, from a node or from an option.
- Variables: flags such as
door_is_lockedthat remember what happened, set by nodes and checked by conditions. - Conditions: rules on options and links, such as "only if
has_keyis true".
Get comfortable thinking in these parts before you write. A good branching scene is a small graph, and most problems you will hit (dead ends, branches nobody can reach, choices the game forgets) are graph problems.
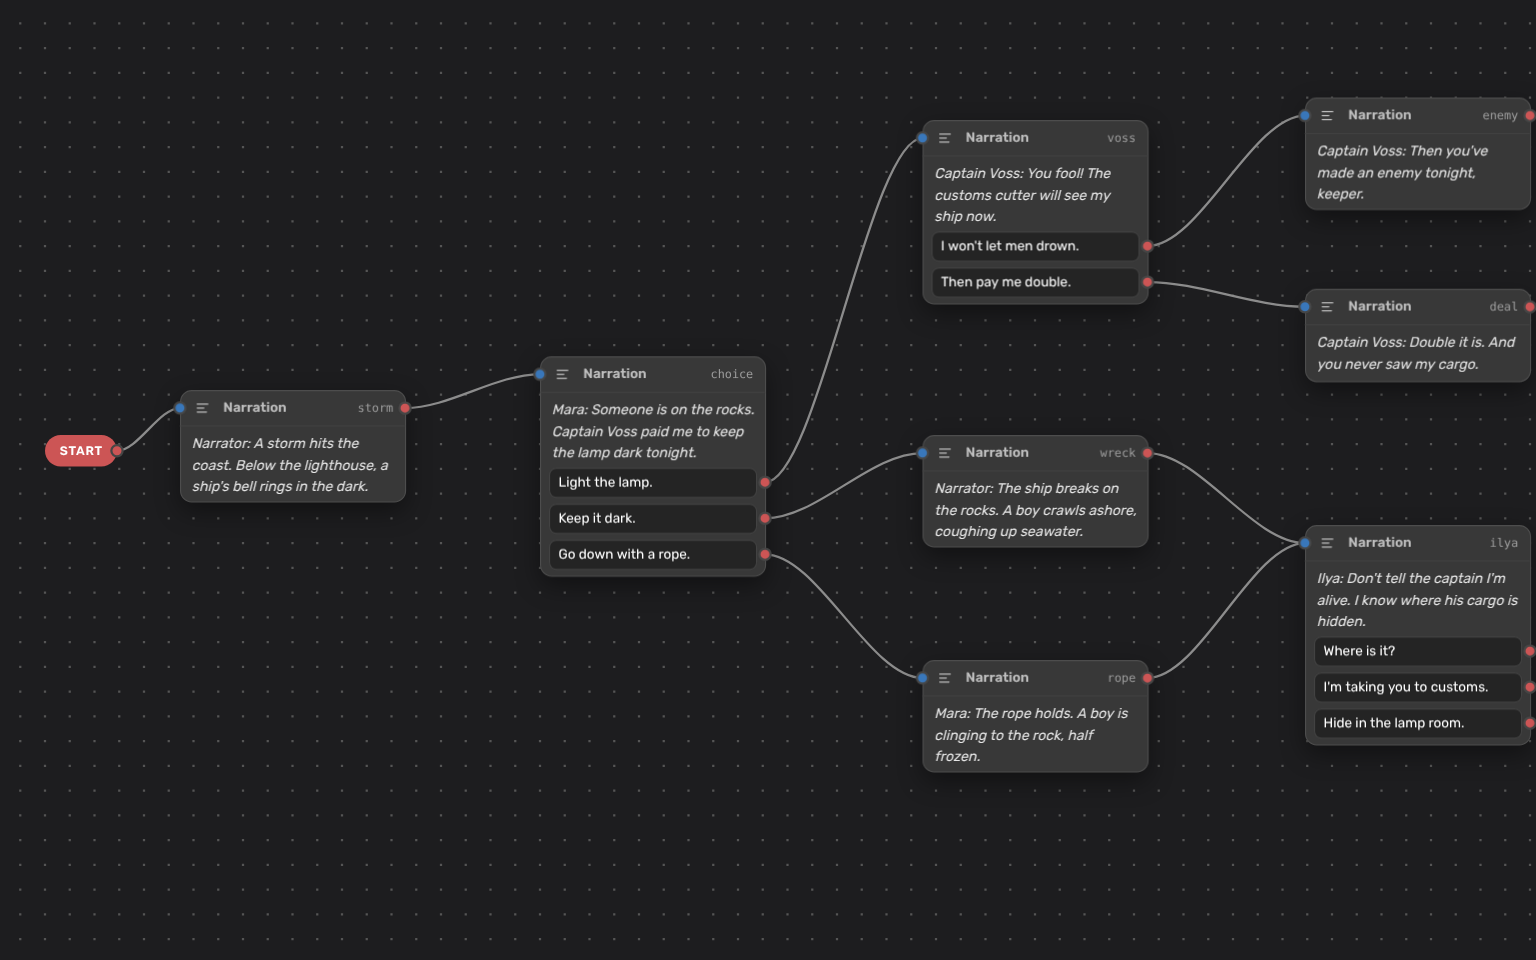
Pick a structure before you write
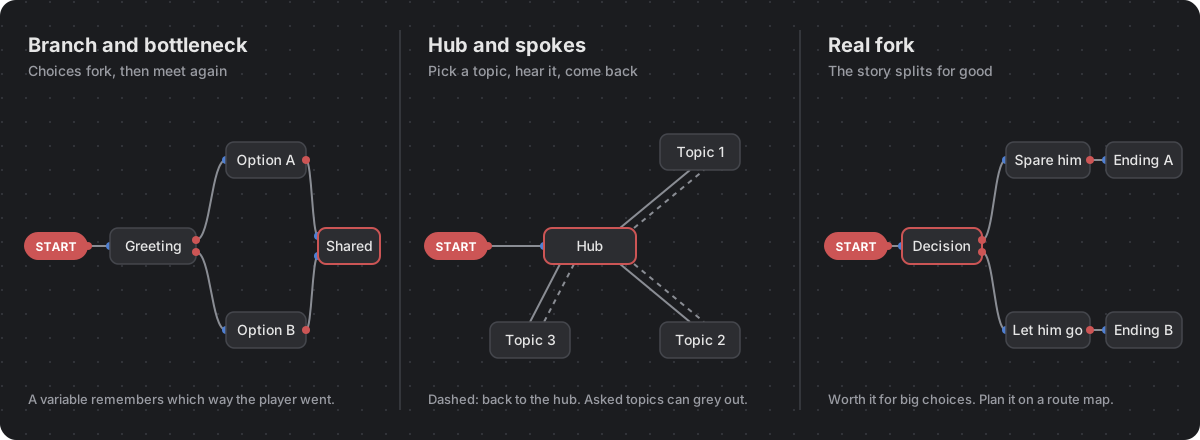
Branch and bottleneck
The workhorse of game dialogue. Choices fork the conversation for a few lines, then the branches meet again at a shared node. The player feels heard, and you write a handful of extra lines instead of a whole second conversation. What the choice changed lives on in a variable.
Hub and spokes
The player stands at a hub, such as a question menu, picks a topic, hears the answer and comes back. Use it for investigation and information scenes. Remember which topics were asked, so a question can be greyed out or answered differently the second time.
Real forks
Sometimes the story genuinely splits: someone lives or dies, a door stays shut forever. Save real forks for choices that are worth the cost, and plan them above the level of a single dialogue, where you can see which later scenes each route reaches. Our Route Planner guide walks through that on an example story.
Write choices that matter
- Give every option a clear intent. The player should know roughly what their character will say and why. A surprise line that contradicts the option feels like a bug.
- Make options different in kind. Three ways of saying yes are one choice. Vary attitude, information or risk.
- Acknowledge the choice later. A single line three scenes later that remembers what the player said does more than an extra branch now.
- Keep the character's voice in every branch. Write a short voice note per character in your lore bible and check each branch against it. Our narrative design document template has a place for it.
- Plan the exit. Every branch needs a way out of the conversation, or back to the hub.
Remember with variables, not copies
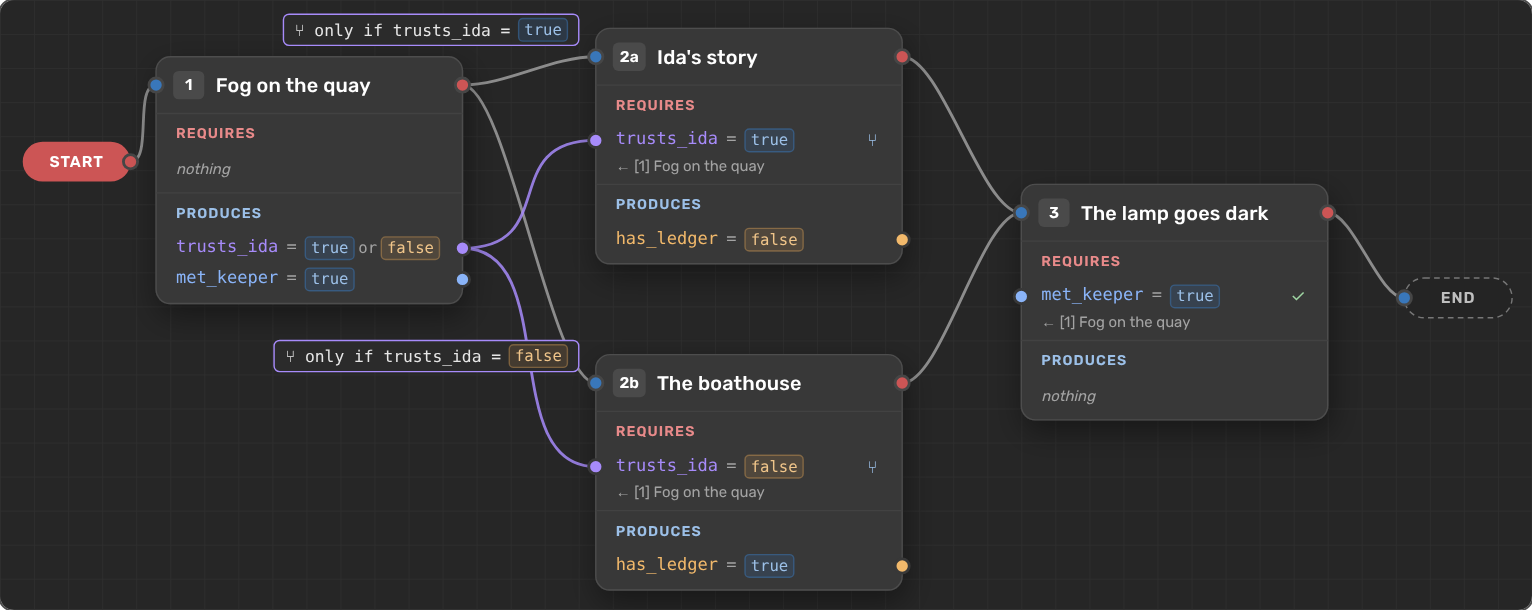
When a choice should matter later, set a variable instead of duplicating the rest of the conversation. Name it for the fact it records (trusts_ida, has_ledger), give it a starting value, and write down what it means and where the story changes it. Then let conditions on options and links react to it.
For "did the player already ask this?", you often don't need a variable at all. In LoreHub every node knows if it was played and every option if it was selected, and conditions can check that directly.
A sketch of a short scene, withtrusts_idastarting as true: Ida greets the lamplighter (node 1). Option "I'm looking for the ferryman" leads to node 2. Option "Who's asking?" setstrusts_ida = falseand leads to node 3. Both nodes 2 and 3 link to node 4, where Ida points to the quay, and node 4 offers one more option, "Can I trust you?", only iftrusts_idais still true. That is a branch and a bottleneck in four nodes.
Test every branch, early
Branching dialogue breaks where nobody looks: the branch only one playtester takes, the option locked behind a variable that is never set. Play it while you write it.
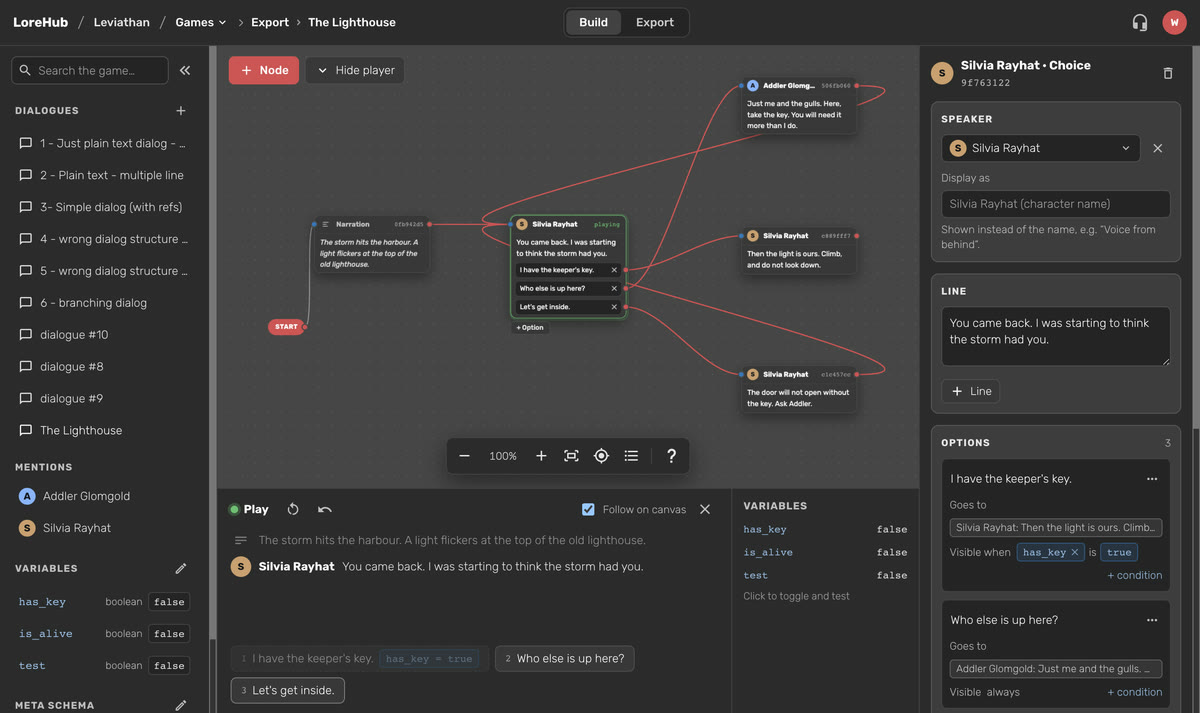
- Play the dialogue as soon as it has a beginning and an end. In the Dialogue Builder, click Show player: a player opens under the canvas and the node you are on lights up.
- Flip variables to reach branches without replaying the whole game. Locked options stay clickable and show the condition that locks them.
- Look for nodes nobody can reach, options that lead nowhere and variables nobody reads. LoreHub's validation reports unreachable nodes, and the
osfcommand line tool runs the same checks on every pull request.
Make it ready for translation
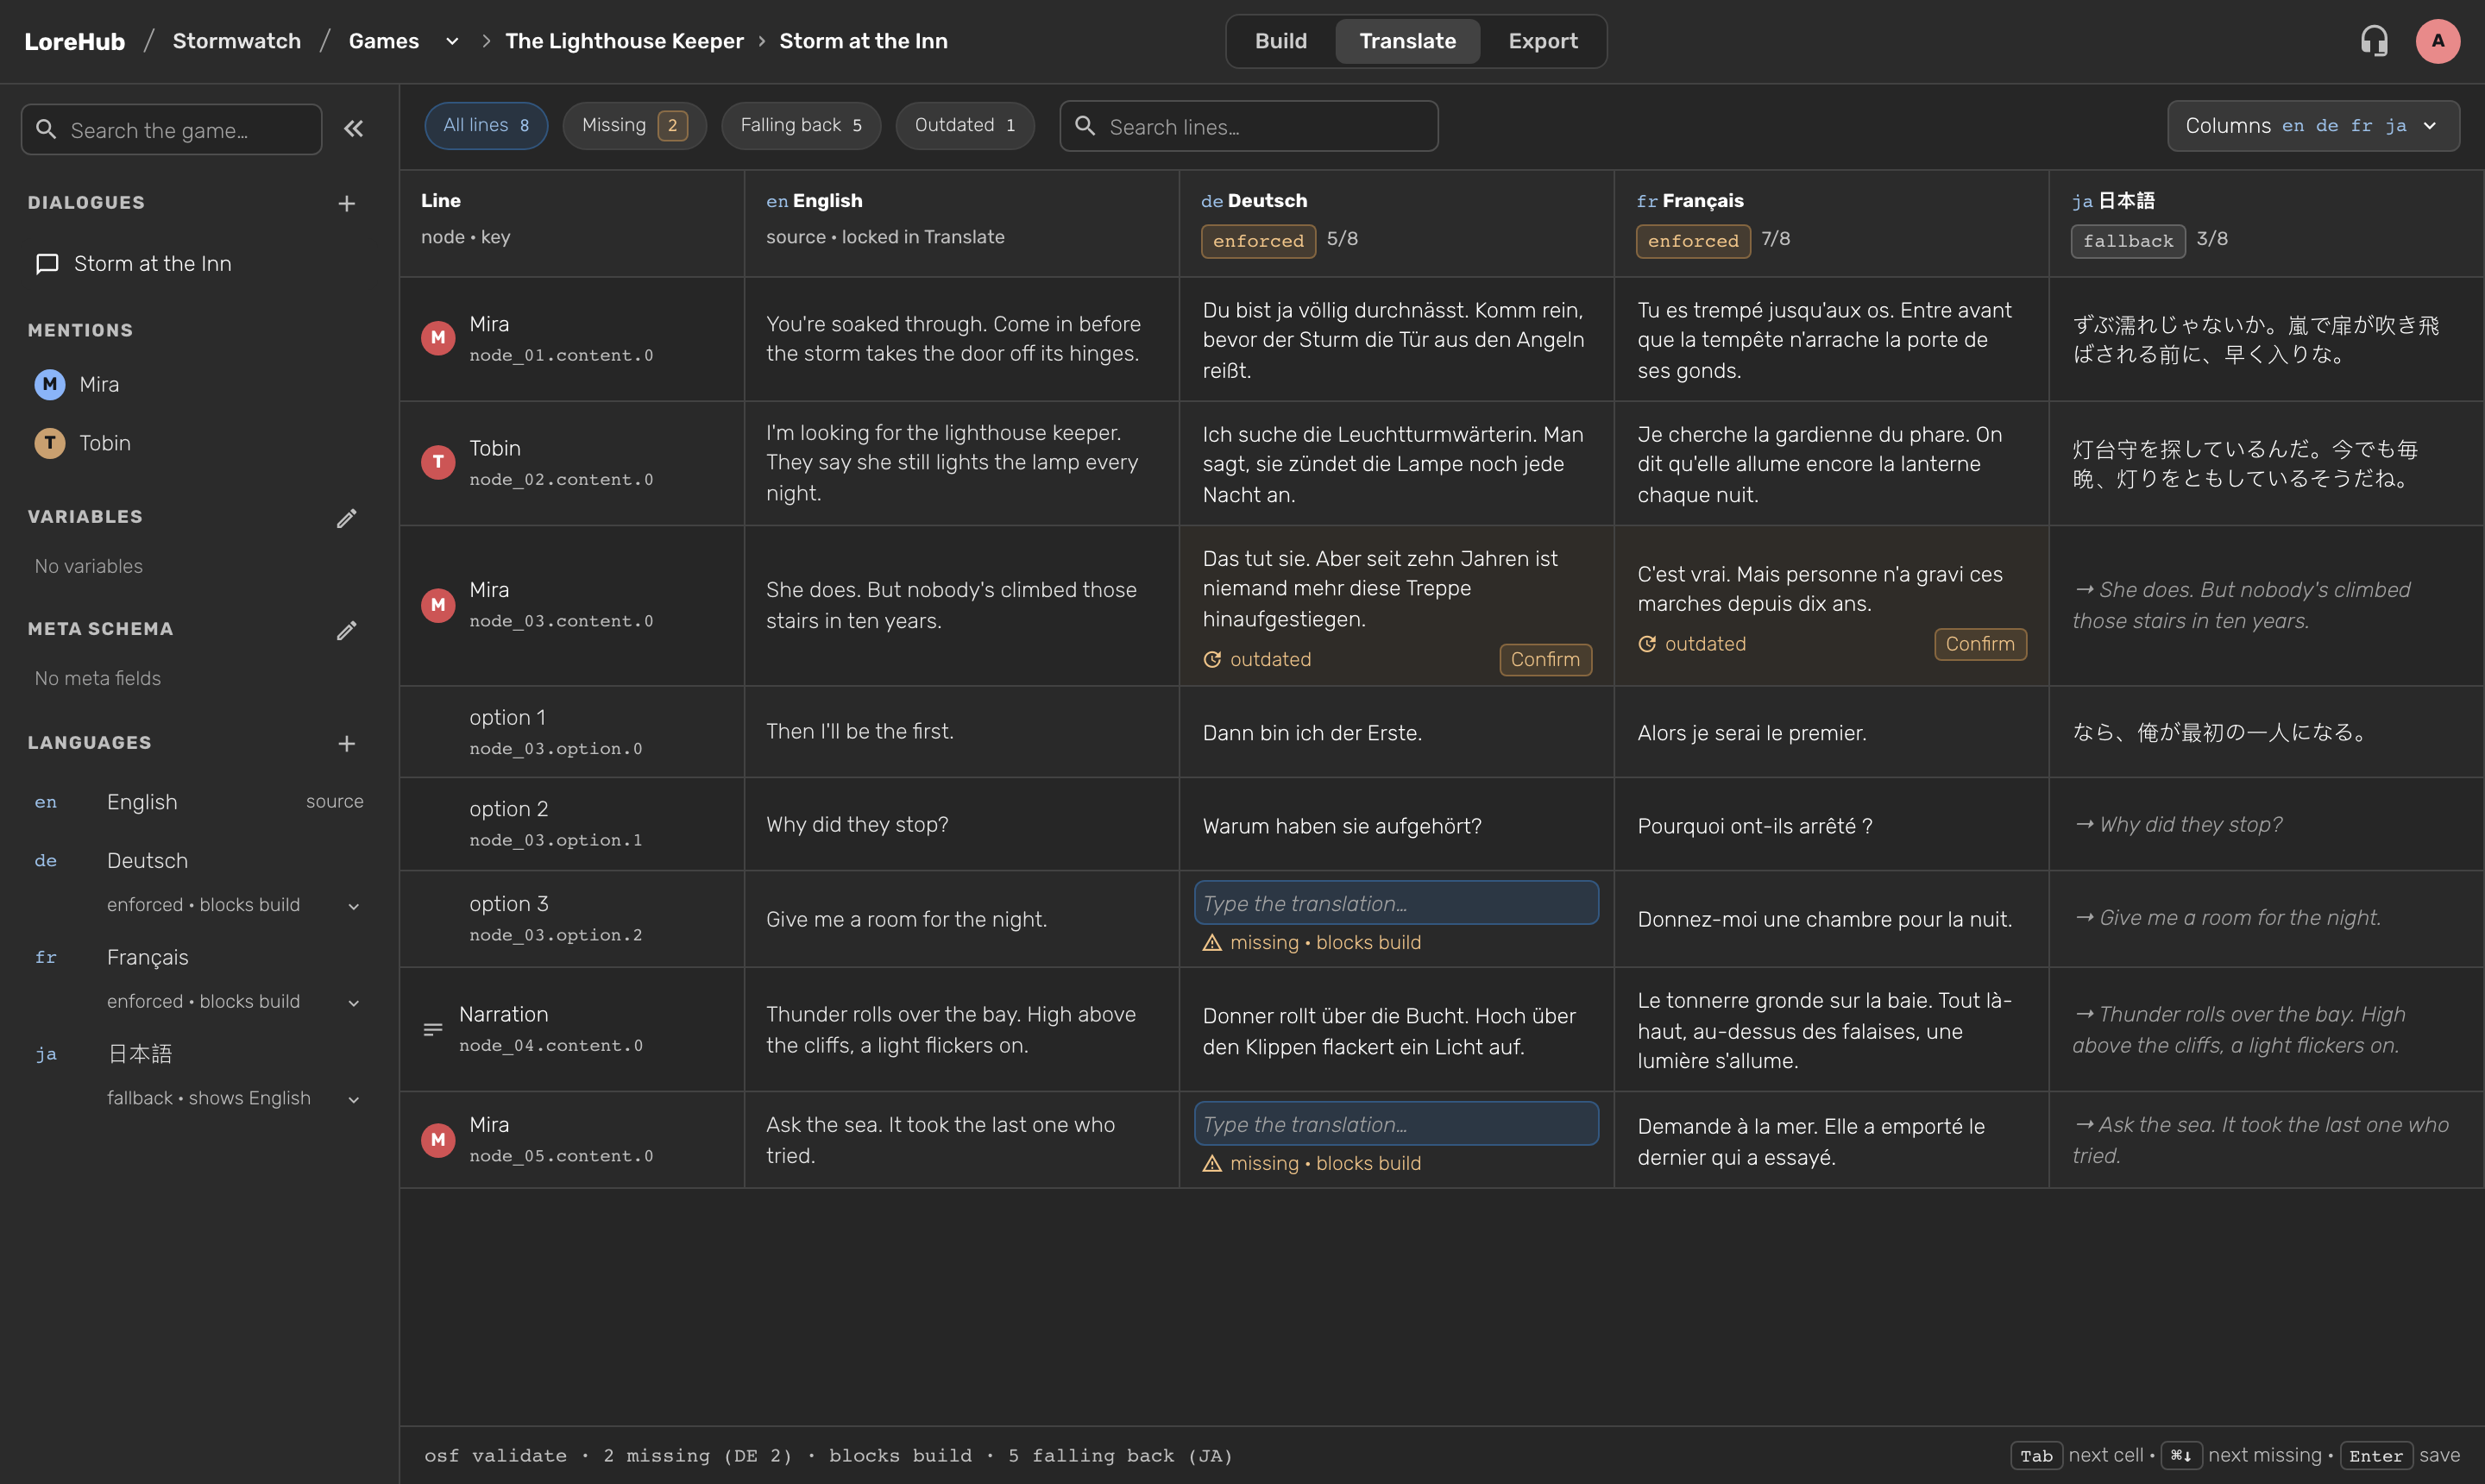
Every line and option should have a stable key, so a translation stays attached to its line when the dialogue changes. Avoid building sentences from pieces at runtime; word order differs between languages. In LoreHub the Translate tab shows every line with its key, like node_03.option.1, and marks a translation outdated when its source line changes.
Hand it to the game
Your engine needs the dialogue as data: nodes, options, links, conditions and the starting value of every variable. LoreHub exports all of that as a documented JSON schema (or YAML), and the game follows the first link whose conditions are all met. The Unity tutorial builds a dialogue player in C# for that export, and the same file works in Unreal, Godot or your own engine.
A checklist for every branching scene
- Write down what the scene needs to know (variables it reads) and what it changes (variables it sets).
- Choose a structure: branch and bottleneck, hub, or a real fork.
- Give every option a clear intent and a way out.
- Play every branch, flipping variables to reach the rare ones.
- Check for unreachable nodes and options without a target.
- Make sure every line has a stable key before translation starts.
To try it on your own scene, start free in LoreHub, and for feedback, please join Discord.